


6 Ways To Join A Ball Of Yarn
5 min read time

Hello Crafters,
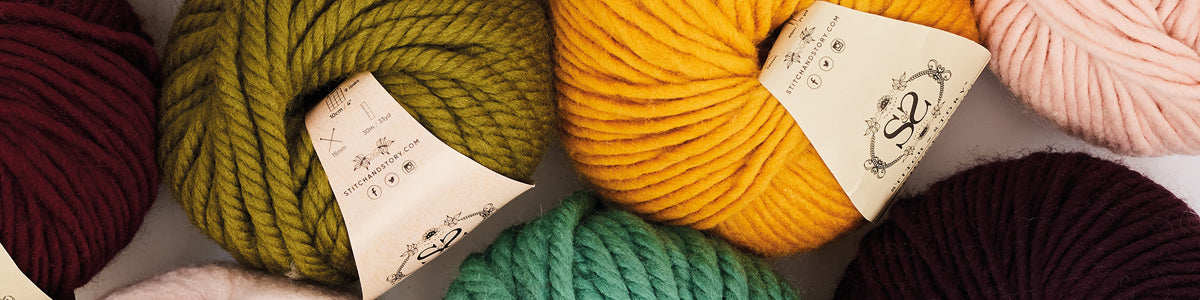
A few of Stitch & Story’s kits require only one ball of wool such as the Lola Pom Slippers or Chunky Cable Headband. However, more often than not, when knitting, you’re going to need to join in a new ball of yarn. There is more than one way to do this and generally the way you do is down to personal preference, although some ways are better suited to certain projects and certain yarns.
Below we’ve put together six ways you can join in a ball of The Chunky Wool Knitting Yarn or The Lil' Merino Baby Knitting Wool. The list is certainly not exhaustive but will hopefully have you joining yarn like a pro in no time.
TIP: Ideally you want to change a ball at the end of a row, for most joins. If the edge is going to be sewn up you can hide the loose ends in the seam and if they’re visible, such as in our scarves or blankets, it looks less obvious than changing a ball mid-row.
Colour change and larger projects that requires joining new balls of yarns:
|
|
 |
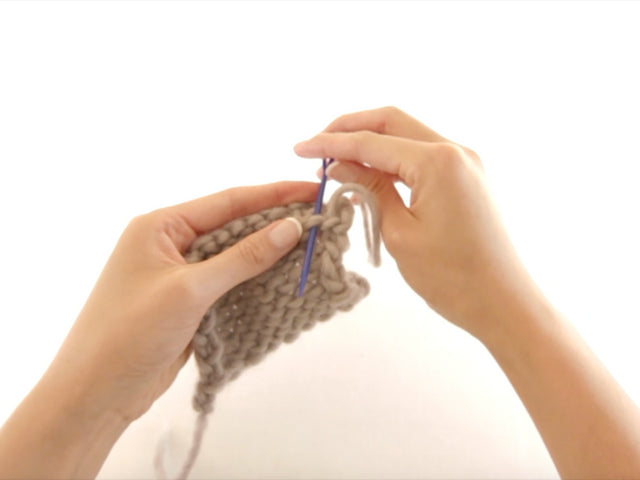
Beginner's guide - How to join yarn
TIE A KNOT
Simply take your old and new strands of yarn and tie them together in a knot. The disadvantages of this method are that a knot tends to show as a lump in your finished piece, it can work its way through to the front of your work and spoil the look of your finished piece, it can pull the stitches surrounding it out of shape and/or it can come undone and unravel your finished piece.

MAGIC KNOT
Stronger than a standard knot, a magic knot will stand up to use and is unlikely to come undone and cause your work to unravel. It won’t work for all projects - in stocking stitch it’s more likely to work its way through to the front but it can be useful for garter stitch projects.
Step 1Lay your project out in front of you with the end of your old yarn tail pointing towards you. Then lay the tail end of your new ball parallel to the old yarn with the tail pointing away from you. The yarn tail ends should overlap about 10cm.

Loop the old yarn under the new yarn so it looks similar to a number "4".

Guide the old yarn back to the left over the new yarn, and over itself.

Loop the old yarn under itself and pull tightly on both its ends. The old yarn will be knotted around the new yarn as opposed to with the new yarn.


Take your new yarn tail and loop it under the old yarn so it looks similar to a "P".

Guide the new yarn back to the right over the old yarn, and over itself.

Loop the new yarn under itself and pull tightly on both its ends. You will have two knots about 5cm apart.


Pulling these two knots together will create a double knot that is almost impossible to undo. Pull on the long ends of both the new and old yarn to slide the knots together. The stronger you tug when they meet up the stronger the knot will be. Tighten each individual knot again by pulling the long and short end of the same yarn.


Cut the short ends of the yarn close to the knot. There is no weaving in required with this kind of knot.


CREATE A SLIP KNOT
Create your first stitch with your new ball using a slip knot (as you would when creating your first stitch to cast on).

 |
 |
Step 1
Create a slip knot in your new yarn ball.
Step 2Insert your needle under your first stitch on your left needle (shown above as you would to do a purl stitch).
Step 3Instead of wrapping your working yarn around your right needle (as you would to create a stitch) thread your stitch created by your slip knot onto your right needle - this is your first stitch of the row.
Step 4Loop your right needle with your slip knot “stitch” under (shown above as you would to do a purl stitch) and slide other stitch off left needle.
Step 5Continue knitting as normal.
Step 6Weave in any loose ends when you’ve finished knitting.
WEAVE IN THE ENDS
Drop the old strand of yarn and, leaving a tail of 15cm, pick up your new working yarn and continue knitting. No knots, no fuss. When it comes to the end of your project weave the loose ends back into your work. You can find six ways to do this in our blog post on weaving in.


ALTERNATE STITCHES
Similar to the ‘WEAVE IN THE ENDS’ method, knitting alternate stitches with the old and new ball of yarn (for at least ten stitches) helps secure the join even more. This method does require being mindful of your tension to avoid puckering.
Step 1With at least 30cm of old yarn remaining, knit your first stitch (or next stitch if you’re joining yarn mid-row) using the old ball of yarn.

Insert your right needle under the next stitch on your left needle, and instead of wrapping the old yarn around, take the new yarn with at least 15cm folded over at the end, and place this loop on the end as your new stitch.

Loop your right needle with your loop “stitch” under (shown here as you would to do a knit stitch) and slide other stitch off left needle.


Bring the old yarn up above the new yarn and knit the next stitch.

Bring the new yarn up from underneath the old yarn and knit the next stitch.

Continue knitting alternating between old and new yarn, always bringing your old working yarn up above the new yarn and your new working yarn up underneath the old yarn. This will prevent your yarns from twisting.

Continue alternating yarn for about 10 stitches or until the end of your row. Then continue knitting as normal in the new yarn only.
 Back
Back
Weave in any loose ends when you’ve finished knitting.

WET FELTING OR SPIT SPLICE
This method can be used for any feltable yarns, which are generally any (non superwash) animal fibres. In particular roving yarn, such as our chunky wool, joins really well using this method.
Step 1Unwind and tease out, into a fan shape, the last inch or two of the old and new yarn you want to join.

Gently thin out the fans by removing some of the fibres from each end. This ensures your join won’t be too bulky in comparison to the rest of your yarn.

Dip each of the ends into a glass of water, just moistening the fibres. Use a paper towel to squeeze out any excess liquid.

Overlap the two fanned ends and placing between your palms rub the yarn strands together vigorously. This friction will felt the two ends together.

If the join is still quite wet you can use a paper towel to squeeze out more moisture. Allow it to fully dry before continuing to knit.

Continue knitting as normal. The join will be completely invisible in your finished piece.