


How to Read A Pattern
6 min read time
We’ve made it easy to understand your knitting and crochet patterns with this handy guide.

Knitting and crochet patterns come in all shapes and sizes, and the style they’re written in can differ greatly between designers and brands. For beginner crafters, reading a pattern can seem like you're reading another language to begin with!
To make things simple, Stitch & Story’s knitting and crochet patterns are designed with the complete beginner in mind. We’ve written and formatted them in a way that allows new crafters to work through a pattern in easily digestible chunks, while learning the key elements needed to make reading any future pattern easy.
Let’s take a closer look at what to expect in our patterns.
How to get started with your knitting or crochet pattern
When you start any knitting or crochet project it’s important that you read through the whole pattern at least once before picking up any tools or yarn. This will give you a brief overview of how many parts your pattern is made up of, and help you identify if there are any new stitches or techniques you may want to practise. It’s also a great chance to take note of any tips that may be shared in the pattern, and identify which instructions relate to the size you’re going to make.
About the sections of your knitting or crochet pattern
Most knitting and crochet patterns follow a similar format, laying out key information for you to be able to complete your project. Here we’ll run you through the sections you’ll find in a Stitch & Story pattern:
You will need
Under this heading you’ll see a list of the things you’ll need for your project: From yarns, to knitting needles or hooks, and sewing needles. If your project is an all-in-one Stitch & Story kit then these items will be included unless otherwise indicated.
Abbreviations
Here you’ll find a list of the stitches and techniques your pattern uses, along with the shorthand letters and numbers used to represent them in the pattern instructions. This is a really important part of your pattern that you may want to refer to throughout the project, so it’s good to familiarise yourself with it before you start.
Practice makes perfect
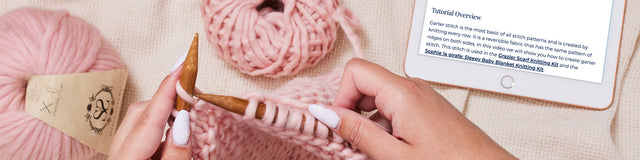
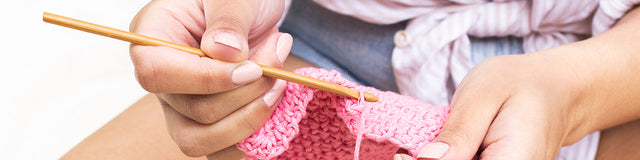
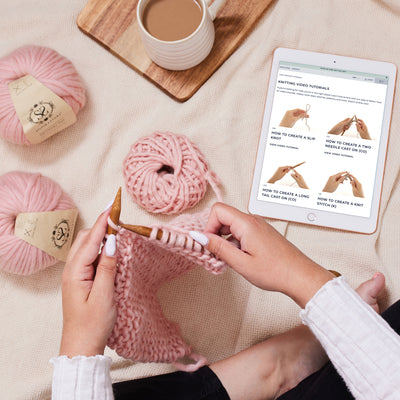
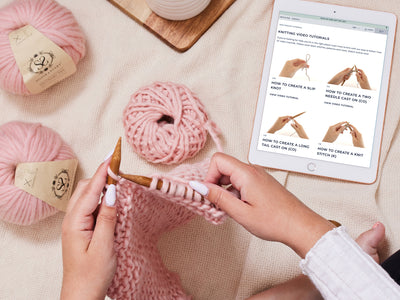
This section recommends you familiarise yourself with the techniques used in the pattern before you get started. You can check out our knitting tutorial videos, and our crochet tutorial videos to help you!
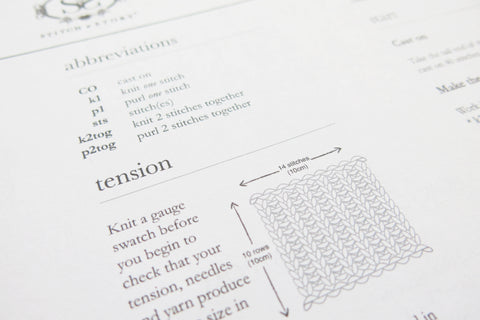
Swatching
Often crafters want to skip this stage in their eagerness to get started with the project, but knitting or crocheting a swatch before you start your pattern is a really important step! A swatch is a simple practice run; it’s an opportunity for you to test your tension, and check that your finished item will end up the same size as indicated on the pattern.
Most swatches are 10cm x 10cm and are created by knitting or crocheting a specified amount of stitches and rows. If your completed swatch is smaller than 10cm x 10cm you can switch to a bigger needle/hook size to achieve the desired dimensions. If your swatch is bigger than 10cm x 10cm you may want to switch to a smaller needle/hook size.
Watch video tutorials on how to knit a swatch and how to crochet a swatch for more tips.
Remember: Your tension might be uneven when first learning to knit or crochet so it’s worth doing a gauge swatch each time you return to a pattern, even if you’ve made the project before.
Measurements
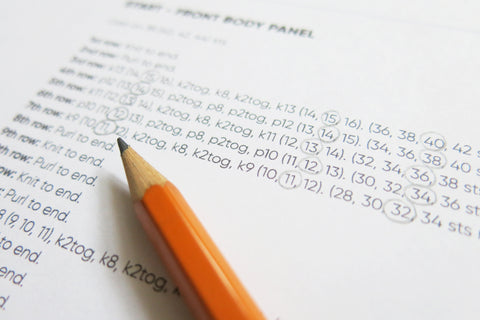
Some patterns are one size only, but others allow you to make multiple sizes. The different sizes and their measurements are indicated under this heading. The pattern is written for the smallest size, with changes for larger sizes in brackets. When only one number is given, it applies to all sizes eg. k1(2,3,4)
Top Tip: If you’re dealing with a pattern with multiple sizes, then it’s a good idea to use a pencil to highlight or circle the numbers related to the size you’re making, before you start. This helps avoid confusion as you work through the pattern.
The pattern
Our pattern instructions are broken down into sections, which will vary for each type of project. These smaller, more manageable sections allow you to focus on one step at a time, keep track of rows, and monitor your progress.
Start
The main pattern instructions come under this heading, which is broken down into further easy-to-follow sections depending on the project.
Top Tip: Using a pencil to tick off completed rows or sections as you go along will make it easier to pick up where you left off in your pattern - especially if you’re taking a longer break or switching between projects.
Finishing
The end of your project! This part of the pattern outlines the last steps you need to take to turn your knit or crocheted pieces into a complete item.
Sewing up
Some patterns require specific sewing up instructions to help you finish, which you’ll find under this heading.
Symbols used in your knitting or crochet pattern
Within your pattern instructions, you’ll find different punctuation marks alongside the abbreviations for the stitches. Here we’ll explain a bit more about what they mean, and how they’re used.
Numbers
In your pattern instructions, you may see numbers next to the stitch abbreviations, such as k1 or 2dc. These numbers indicate how many of that type of stitch you should work, so k1 means knit 1 stitch, and 2dc means double crochet into 2 stitches.
Commas
Whether you’re working in rows, or rounds, patterns will use commas to help break up the instructions into steps. For example, in a crochet pattern you may see an instruction that reads 5dc, dec, 1dc - this translates into three steps to work your pattern row.
Step 1: 5dc - Double crochet into the next 5 stitches
Step 2 : dec - Make a decrease
Step 3: 1dc - Double crochet into the next stitch

Asterisk
These are used when part of a set of pattern instructions need to be repeated. In our knitting patterns, the * will appear before the sequence of stitches that need to be repeated, which are then followed by repeat from * and an instruction for when to stop repeating.
You may be asked to repeat a sequence of stitches a number of times, or until you have a certain number of stitches remaining, or until ‘end’ - this means until the end of the row you’re working on.
As an example, *k1, p1, repeat from * to end means you need to knit one stitch, purl one stitch, knit one stitch, purl one stitch, continuing to alternate until you reach the end of your row of stitches.
Very similarly, in our crochet patterns, the * marks the start and end of the sequence of stitches that need to be repeated, which is then followed by the number of times it should be repeated.
For example, repeat *dc2, inc* 4 times means you need to double crochet the next two stitches, increase the next stitch (that’s your first repeat), double crochet the next two stitches, increase the next stitch (the second repeat), double crochet the next two stitches, increase the next stitch (the third repeat), double crochet the next two stitches, increase the next stitch (the fourth and final repeat).
Brackets
You’ll come across the use of both round brackets ( ) and square brackets [ ] in your patterns. They can be used in slightly different ways, so make sure you read these parts of your pattern carefully. Here are a few examples:
- Sometimes [ ] are used to divide a row into segments that are easier to read and count.
- A set of instructions within ( ), followed by a number of times, means you have to repeat the instructions inside the brackets that number of times eg. (k1, p2) 2 times.
- The instructions within ( ) can also indicate the alternative sizes in the pattern you’re making eg. k1(2,3,4)
- ( ) are also used to indicate how many stitches are remaining on your needle at the end of a row eg. (20 sts rem)
Top Tip: Occasionally symbols are used differently for specific Stitch & Story patterns so make sure you’ve read through the abbreviations segment thoroughly and made note of any specific symbols and their definitions outlined there.
If you’re new to knitting or crochet this may feel like a lot to take in, but reading patterns gets simpler with time. Just like we knit or crochet one row at a time, take reading a pattern one step at a time and you’ll be fluent in the language of patterns before you know it!

Need a little help?
Check out our knitting tutorial videos, and our crochet tutorial videos for the stitches and techniques used in your patterns, and if you have any questions, you can get in touch with our team at hello@stitchandstory.com
What’s your next project? Share your photos with a community of crafters on Instagram and Facebook.