


How to Crochet Alpine Stitch
Stitches | 1 min read time
Tutorial Overview
Alpine stitch is a textured pattern created by alternating rows of single crochet, with rows of double crochet and raised double crochet (all US terminology).
Watch
Step-by-step guide
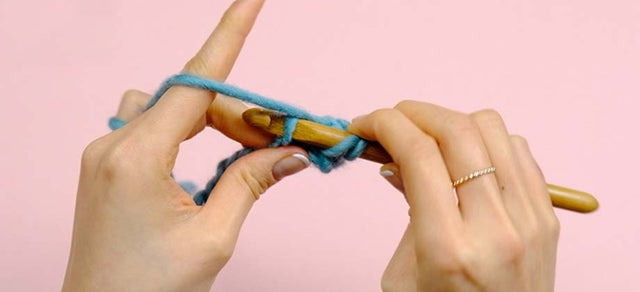
Step 1:
To start the pattern repeat, you'll work a row of single crochet stitches.
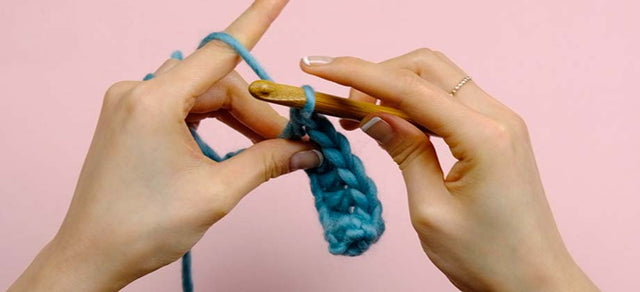
Step 2:
For the second row of the repeat, begin by making 3 chain stitches. This is our turning chain, and counts as the first double crochet.
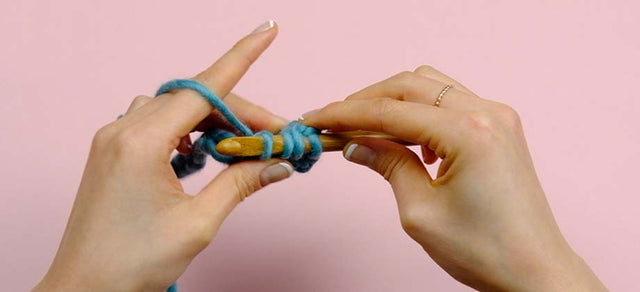
Step 3:
Work one double crochet into the next stitch.
Step 4:
Next, we'll make one raised double crochet around the stem of the double crochet 2 rows below, skipping the single crochet row in between.
Step 5:
Now skip the next single crochet in your row and work a double crochet into the next stitch.
Step 6:
Leave the next double crochet 2 rows below unworked.
Then work another raised double crochet around the stem of the next double crochet 2 rows below.
Step 7:
Keep alternating double crochet and raised double crochet until you reach the end of the row.
Top Tip: Remember to skip the right stitches as you work into the row below, and 2 rows down, to avoid accidentally increasing the stitch count in this row.
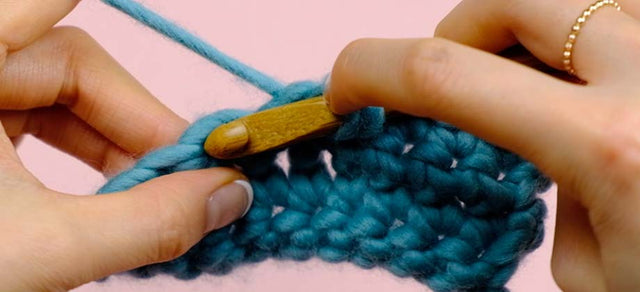
Step 8:
At the end of the row you'll work the last 2 stitches as standard double crochet stitches.
The double crochet and raised double crochet stitches should alternate in every other row.
Step 9:
You'll now repeat these 2 rows as many times as required for your project to create the alpine stitch pattern.
< See all Crochet Video Tutorials

How to Create a Slip Knot
Get Started | 1 min read time
How to Create a Foundation Chain
Get Started | 1 min read time
How to Count Chains
Get Started | 1 min read time
How to Single Crochet (US terminology)
Stitches | 1 min read time
How to Half Double Crochet (US terminology)
Stitches | 1 min read time
How to Double Crochet (US terminology)
Stitches | 1 min read time
How to Treble Crochet (US terminology)
Stitches | 1 min read time

How to Slip Stitch (ss)
Stitches | 1 min read time
How to Decrease Using sc2tog (US terminology)
Stitches | 1 min read time