


How to Create Linked Double Crochet (US Terminology)
Stitches | 1 min read time
Tutorial Overview
Linked double crochet is a variation of the standard double crochet stitch (US terminology). Neighbouring stitches are crocheted together, linking the stitches that sit side by side, creating a more dense fabric with nearly no gaps between the stitches.
Watch
Step-by-step guide
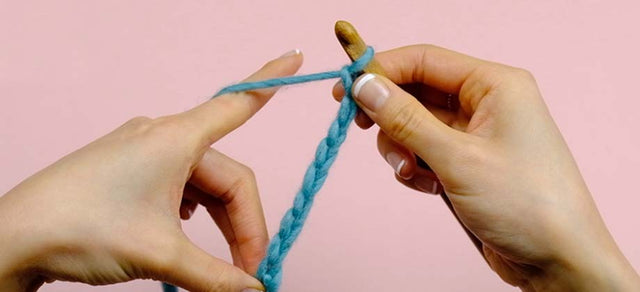
Step 1:
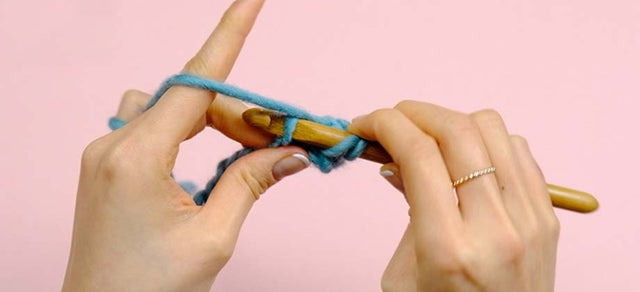
Start your row with 3 chains. This turning chain counts as the first stitch of the row.
Step 2:
Insert your hook into the second chain from the hook. Yarn over and draw a loop through.
Step 3:
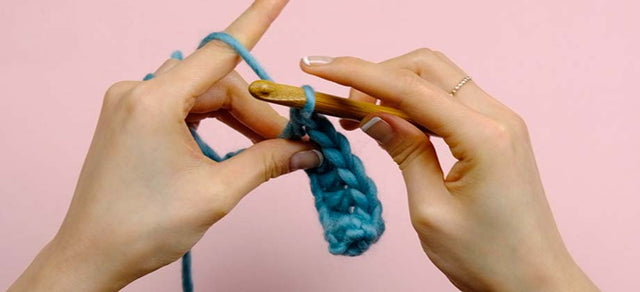
Then insert your hook into the next stitch of the row, yarn over and draw a loop through. You'll now have 3 loops on your hook.
Step 4:
Yarn over again and draw through 2 of the loops.
Step 5:
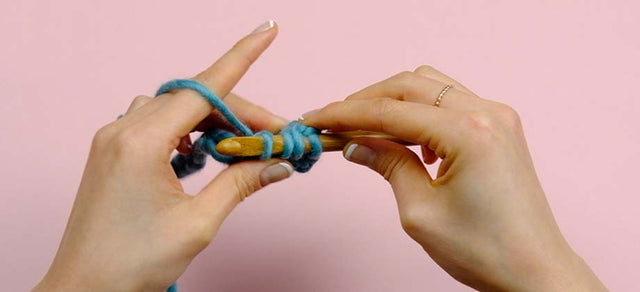
Yarn over once more, and draw through the last 2 loops on your hook. This will complete your first linked double crochet.
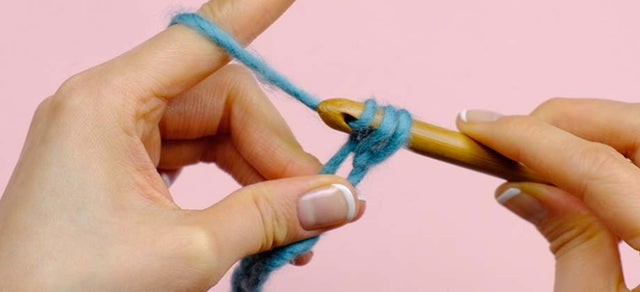
Step 6:
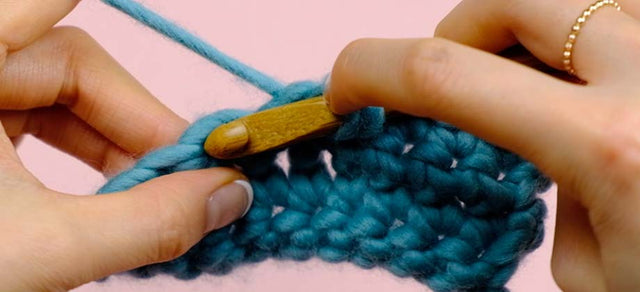
To create the next stitch, insert your hook through the horizontal bar of the completed stitch. Yarn over and draw a loop through.
Step 7:
Insert your hook into the next stitch, yarn over and draw a loop through.
Step 8:
Yarn over and draw through 2 of the loops on your hook.
Step 9:
Yarn over again, and draw through the last 2 loops on your hook. You have now completed the linked double crochet.
Step 10:
To work the next one, insert your hook through the horizontal bar of the just completed stitch. Yarn over and draw a loop through.
Step 11:
Insert your hook into the next stitch, yarn over and draw a loop through.
Step 12:
Yarn over and draw through 2 of the loops on your hook.
Step 13:
Yarn over again, and draw through the last 2 loops on the hook. You have now completed your next linked double crochet.
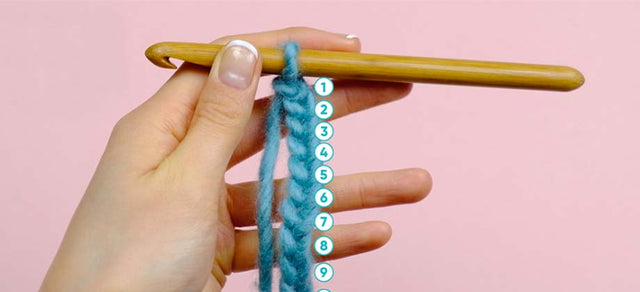
Repeat these steps to work the entire row in linked double crochet.
< See all Crochet Video Tutorials
How to Create a Slip Knot
Get Started | 1 min read time
How to Create a Foundation Chain
Get Started | 1 min read time
How to Count Chains
Get Started | 1 min read time
How to Single Crochet (US terminology)
Stitches | 1 min read time
How to Half Double Crochet (US terminology)
Stitches | 1 min read time
How to Double Crochet (US terminology)
Stitches | 1 min read time
How to Treble Crochet (US terminology)
Stitches | 1 min read time

How to Slip Stitch (ss)
Stitches | 1 min read time
How to Decrease Using sc2tog (US terminology)
Stitches | 1 min read time