


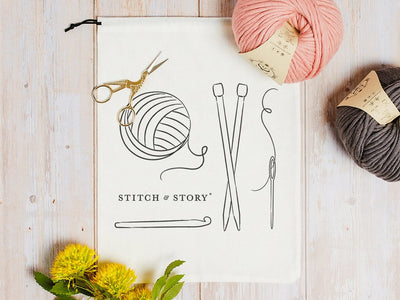


Understanding Patterns And How To Read Them (Part 2)
Learn with Stitch & Story | 4 min read time
Hello crafters,
This is our second blog post on understanding and reading patterns so if you’ve not read Part 1 we recommend you take a look at that first. You can find it by clicking here.
Now that you’ve gotten to grips with the overall layout of a Stitch & Story pattern and worked your way through the preparation it’s time to tackle the knitting/crochet instructions themselves.
BEGINNER’S GUIDE - HOW TO READ KNITTING/CROCHET PATTERN INSTRUCTIONS
FORMAT
In Part 1 we detailed the different information found in a pattern such as gauge and materials needed. In a Stitch & Story pattern the knitting/crochet instructions are arranged under start, finishing and sewing up.
Start
The main pattern instructions come under this heading, which is broken down into further digestible sections (see below) depending on the project.
Finishing
The end of your project, this part of the pattern outlines the last steps you need to take to turn your knit or crocheted piece(s) into a complete item. This includes, but is not limited to, casting off, sewing up, weaving in ends and blocking.
Sewing Up
Some patterns require specific sewing up instructions to help you finish, which you’ll find under this heading.
SECTIONS
Stitch & Story pattern instructions fall under the heading ‘start’ but in order to make the pattern easier to read we break these down into further sections with individual headings such as ‘cast on’ or ‘main pattern’. These smaller, more manageable sections allow you to focus on one step at a time, keep track of rows and monitor your progress. The defined section breaks or pauses also mean you can set the project aside and easily pick it up again later by continuing with the next section.
TIP: Using a pencil to tick off completed rows or sections as you go along will make it easier to pick up where you left off in your pattern - especially if you’re taking a longer break or switching between projects.
Counting rows
Each section has its own row count so you will often see the row number restarting at one under a new section heading. For example the Luca Pom Hat and the Easy Slumber Socks start off with a rib stitch band/cuff of 6 rows followed by the ‘main pattern/section’ which starts off with a new 1st row. Any row counts specified on a pattern - such as ‘You will have completed 20 rows in total.’ - apply to the section whose heading they come under only.
SYMBOLS USED
In Part 1 we looked at abbreviations; your code for understanding the pattern language. In addition to the basic language of abbreviations with numbers, knitting/crochet patterns use symbols to help you read them.
Commas ,
Punctuation in patterns is very important. Everything between commas is treated as one step.E.g. dc5, dec, dc1 translates as step 1 = double crochet the next five stitches, step 2 = decrease the next stitch, step 3 = double crochet the next stitch.
Asterisk *
An asterisk indicates a repeat. Patterns are full of repeats.
In S&S knitting patterns the * will appear before the sequence of stitches that have to be repeated, which are then followed by repeat from * to x number of stitches or end. End refers to the end of the row.E.g. * k1, p1, repeat from * to end translates as knit one stitch, purl one stitch, knit one stitch, purl one stitch, continuing in this fashion until the row has ended.
In S&S crochet patterns the * sandwiches the sequence of stitches that have to be repeated and is followed by the number of times it should be repeated.E.g. Repeat *dc2, inc* 4 times translates as double crochet the next two stitches, increase the next stitch, double crochet the next two stitches, increase the next stitch, double crochet the next two stitches, increase the next stitch, double crochet the next two stitches, increase the next stitch.

Parentheses ( ) or [ ]
Parentheses have multiple uses in a pattern.
Sometimes [ ] are used to divide a row into segments that are easier to read and count (such as in our Cable Coo Hat pattern).
( ) followed by a number of times means you have to repeat the instructions inside the parentheses that number of times.E.g. (k1, p2) 2 times
Other times ( ) indicates alternative sizes.E.g. k1(2,3,4)
TIP: In patterns with multiple sizes indicated it’s a good idea to use a pencil to highlight or circle the numbers related to the size you’re making, before you start. This helps avoid confusion as you work through the pattern.
( ) are also used to indicate how many stitches are remaining on your needle at the end of a row.E.g. (20 sts rem)

TIP: Occasionally symbols are used differently for specific Stitch & Story patterns so make sure you’ve read through the abbreviations segment thoroughly and made note of any specific symbols and their definitions outlined there.
OTHER
Rem sts
This is an abbreviation for remaining stitches and indicates how many stitches you should have on your knitting needle. You will see this used in a pattern that has increases and decreases which means that the amount of stitches on your needle will change from the number you originally cast on. Usually you will see ‘rem sts’ indicated at the end of a row that has included an increase or decrease stitch. If there is no ‘rem sts’ at the end of a row then the amount of stitches on your needle should match the previous row.
In crochet patterns, where rows/rounds contain increases or decreases, the amount of stitches you should have when you complete a row/round is indicated in brackets at the end of it.E.g. dc6, dec, dc1, dec, dc6. (15 sts)
If you’re new to knitting and/or crochet this may feel like a lot to take in but reading patterns gets simpler with time. Just like we knit or crochet one row at a time, take reading a pattern one step at a time and you’ll be fluent in the language of patterns before you know it.
TIP: Not every pattern is set out in the exact same way so remember to always read through the whole pattern at least once before picking up any tools or yarn.
Happy crafting!